How To: Root the Nexus 6P or Nexus 5X on Windows, Mac, or LinuxThe Foolproof Guide
This year, Google released two Nexus phones to glowing reviews, and as we've grown to expect, the Android community wasted no time in coming up with a root method for both. In fact, legendary root developer Chainfire even devised an entirely new "systemless" method for rooting that should make updating a bit less complicated, along with a few other benefits.Don't Miss: All the Android Terminology You Need to Know The new method roots your device without modifying Android's system partition at all—hence the systemless root moniker. This means that fewer of Android's built-in security measures need to be bypassed in order to gain root access, and in turn, early reports even indicate that Android Pay works with this new method.Provided you have a PC, Mac, or Linux machine, rooting your shiny new toy is a relatively simple process. There are quite a few steps involved, though, but I'll go over each of them in as much detail as possible to make sure everything goes off without a hitch.
Before You BeginRooting an Android 6.0 Marshmallow device requires that you install a modified boot image, which means you'll need to unlock your device's bootloader. The process of unlocking your bootloader will wipe all data on your phone, so make sure you have any important files backed up on an separate storage device.Additionally, you'll need to connect your phone to your computer to run a few commands. Considering that the Nexus 5X and 6P are among the first devices to ship with a USB type C connector, and most computers still use a USB type A connector, this means that you will likely need a USB-C to USB-A cable. For a list of these types of cables that fully comply with the new USB-C standard, head to this link.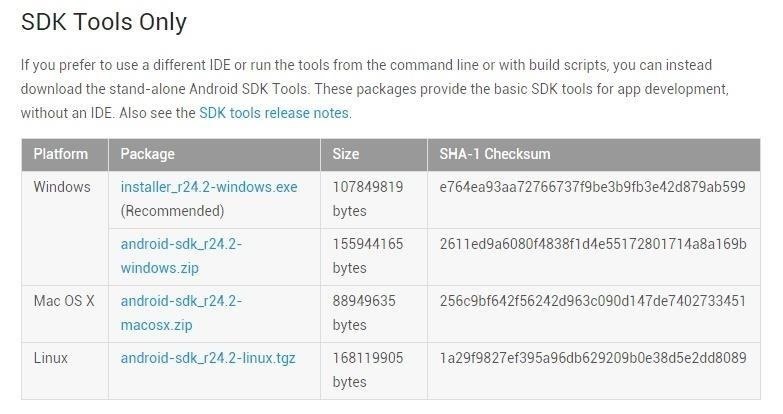
Step 1: Install the Android SDK on Your ComputerTo begin, you'll need to grab a copy of the latest Android SDK. From your computer, head to the official site to download the file for your particular operating system. The installation process will vary depending on your operating system. Windows users can simply launch the EXE file and follow the provided instructions to install the full Android SDK, which will be saved in the C:\Program Files (x86)\Android\ folder. Linux and Mac users will have to extract the contents of the ZIP to a folder that can be accessed easily. Take note of this folder's location, as you will need to copy some files here later. From here, if you're using a Linux or Mac machine, open a terminal window and change directories to the /android-sdk-linux/tools/ or /android-sdk-macosx/tools/ folder that you just extracted. Next up, type android sdk (Linux) or ./android sdk (Mac) to launch the SDK Manager. After that, you'll need to download the Platform Tools package if you're using a Linux or Mac computer. Select the "Android SDK Platform-tools" option, then click the install button to take care of that.
Step 2: Install the ADB & Fastboot Drivers on Your ComputerNext up, for your computer to be able to fully interact with your Nexus, you'll have to make sure you have the ADB and Fastboot drivers installed on your system.Windows Users:If you own a Windows PC, you can download the drivers at this link. Just run the file, then follow the prompts, and you'll be good to go.Linux Users:If you're a Linux user, download and extract this ZIP file, then run the script with Terminal.Mac Users:For Mac users, the process of installing the proper drivers is a bit more involved. Please see our guide on the topic for more information.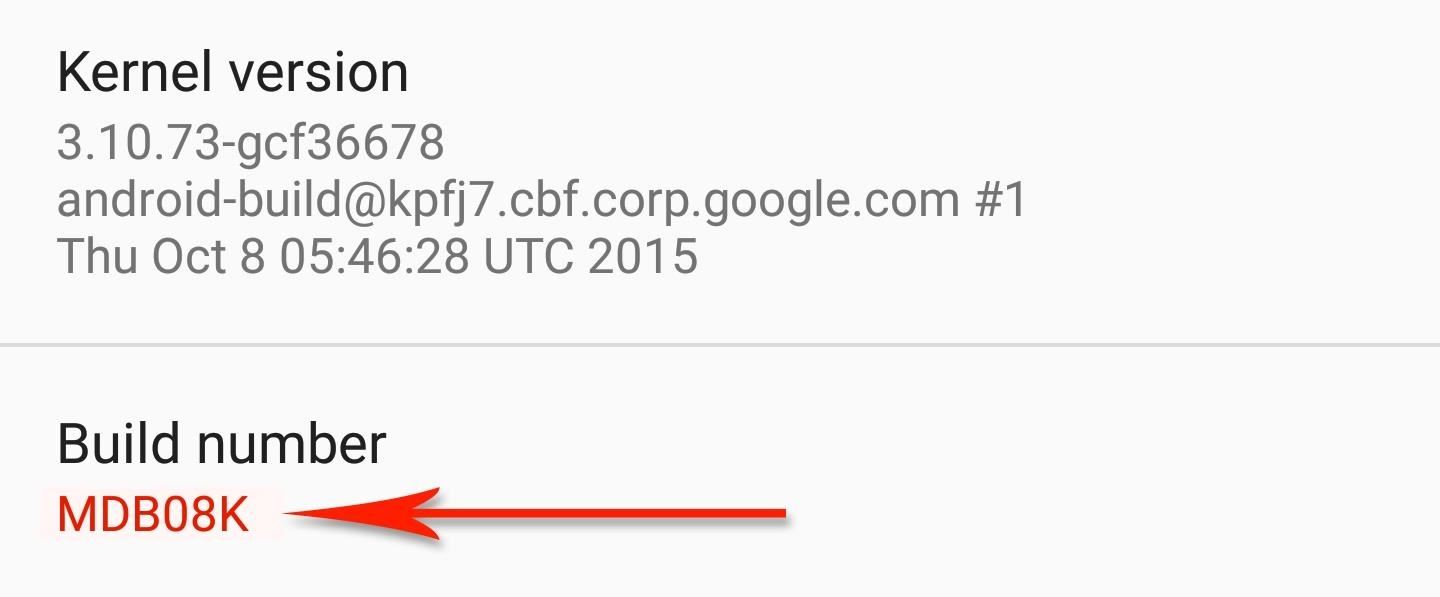
Step 3: Download the Neccesary FilesIt's very important that you download the proper root files for your device and Android version. To make sure you're using the right files, open your phone's Settings menu, then scroll down and select "About phone." From here, make a note of the Build number listed at the bottom of the screen. Next, if you're using a Nexus 5X, download the following files to your computer, making sure that the build number shown here matches the one on your phone:Nexus 5X modified boot image (build numbers MDB08I, MDB08L, & MDB08M) TWRP recovery v2.8.7.2 for Nexus 5X (any build number) If you're rooting a Nexus 6P, download the following files instead—but again, make sure the build numbers match up:Nexus 6P modified boot image (build numbers MDB08K, MDB08L, & MDB08M) TWRP recovery v2.8.7.2 for Nexus 6P (any build number) Then, regardless of your phone model or build number, download the SuperSU ZIP and transfer the file over to your phone:SuperSU v2.56 ("systemless" version)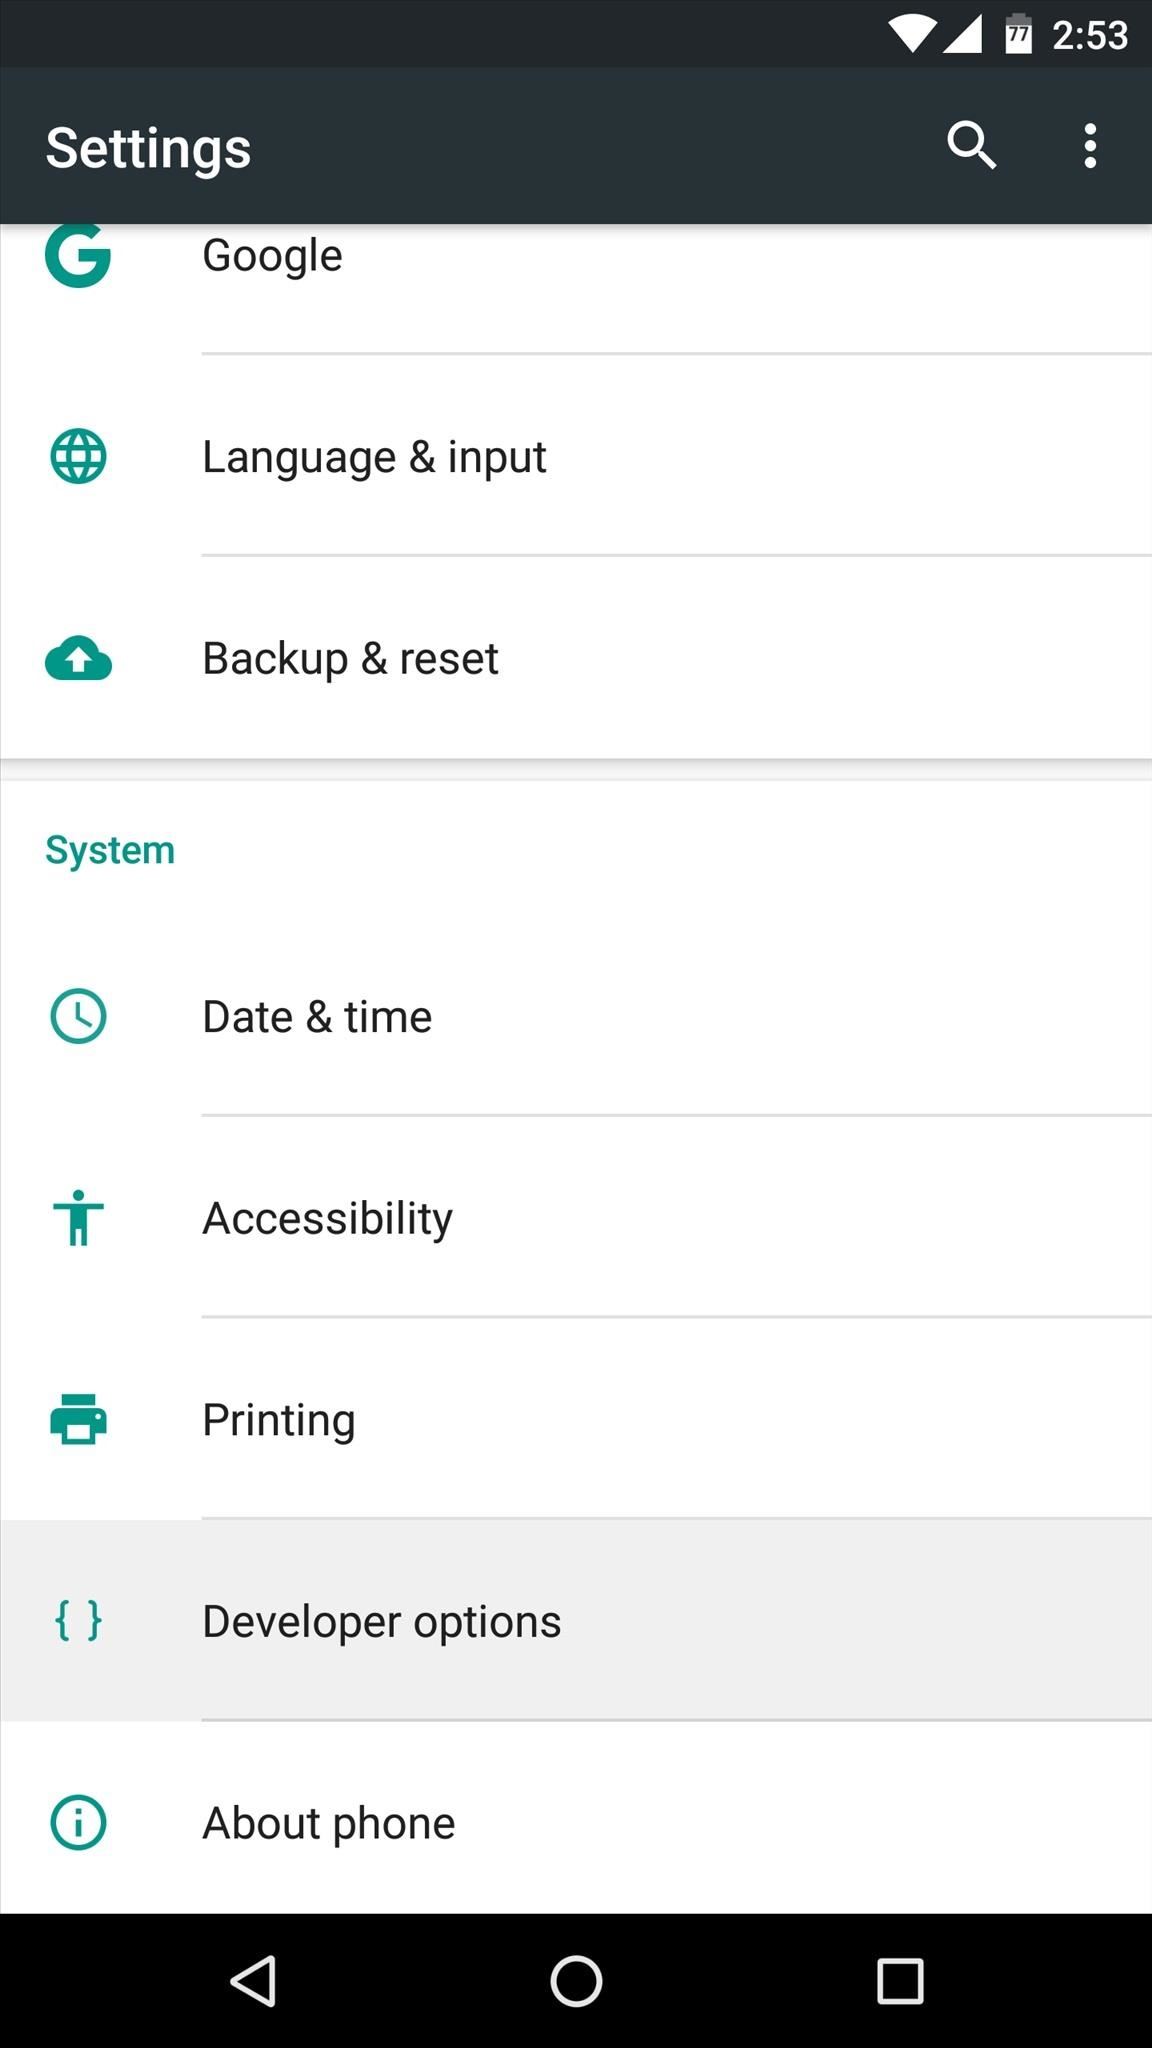
Step 4: Enable OEM Unlocking on Your PhoneFrom here, you'll need to enable Android's hidden "Developer options" menu so that you can then turn on a single option. Check out our full guide to see how to unlock it, if it's not already. In the "Developer options" menu, tap the "OEM unlocking" entry to enable it, then press "OK" when prompted to verify your choice.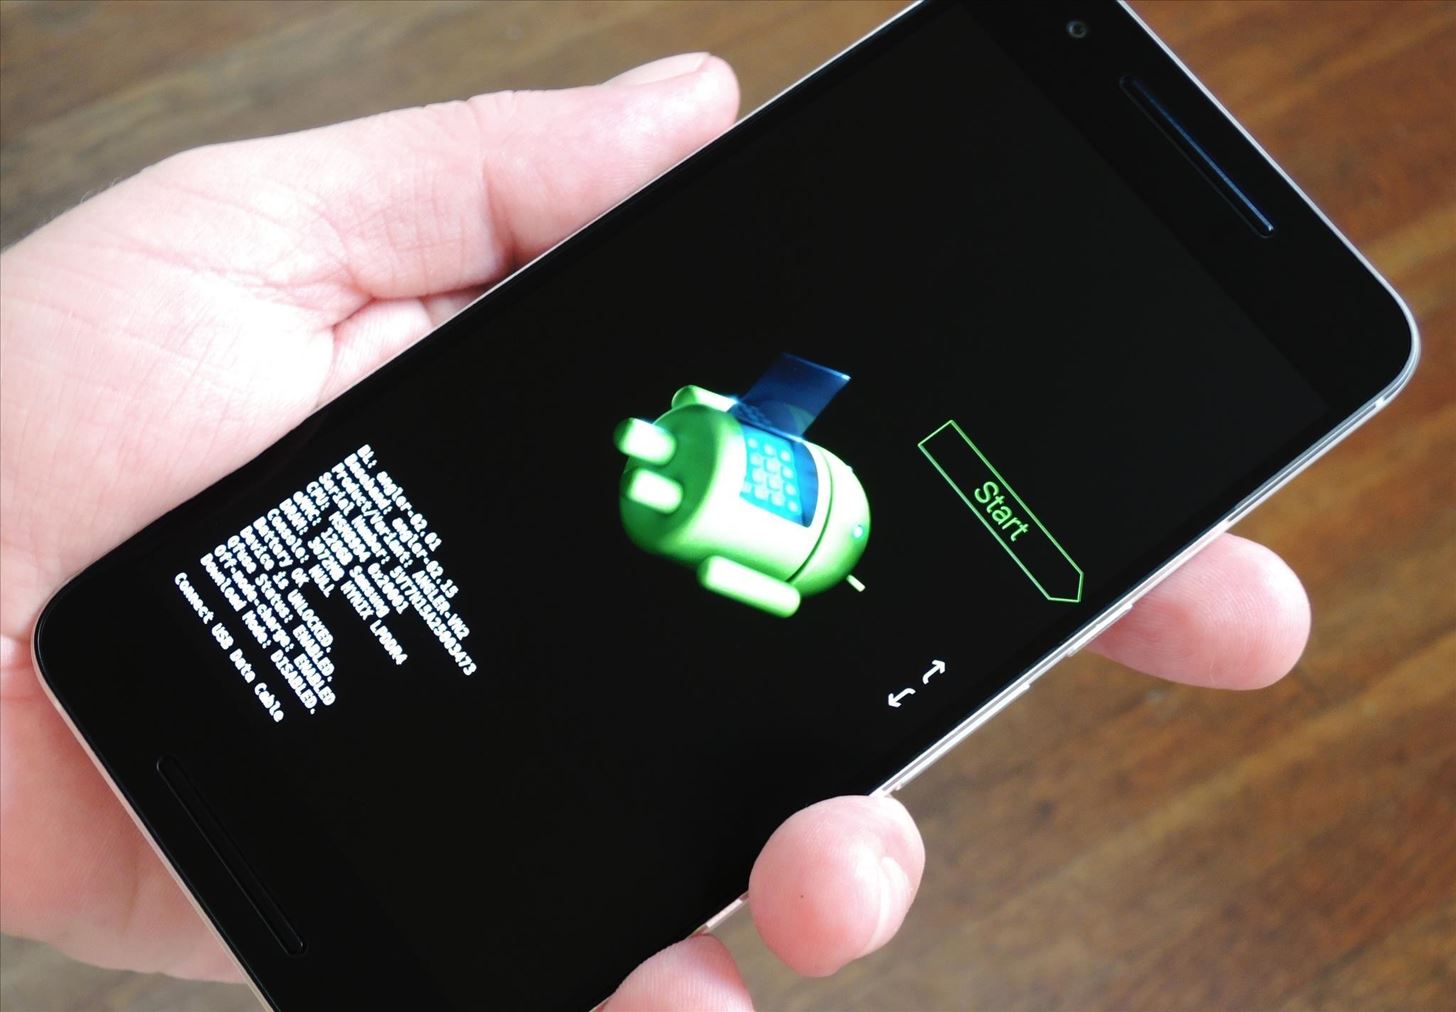
Step 5: Put Your Phone into Bootloader ModeFrom here, you'll need to put your phone into bootloader mode. Start by powering your device completely off. When the screen goes black, press and hold the volume down and power buttons simultaneously. Within a few seconds, you'll see Android's bootloader menu (depicted below). From here, connect your phone to your computer using a USB data cable.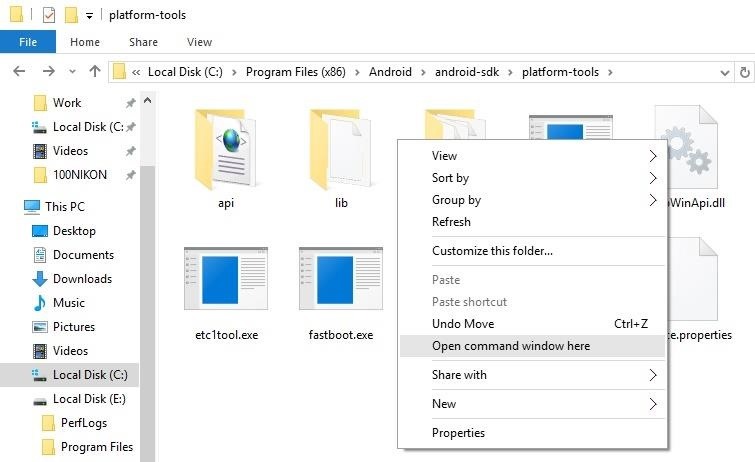
Step 6: Unlock the BootloaderWith the prep work out of the way, you're ready to get down to business. To begin, open a command prompt window, then change directories until you arrive at the /android-sdk/platform-tools/ folder. Windows users can simply open the C:\Program Files (x86)\Android\android-sdk\platform-tools\ folder, then hold down the shift button and right click any empty space, and choose "Open command window here." Next, type in the following command and press enter:fastboot devices If this returns a series of letters and numbers, that means your device is connected properly and you're good to go. If it does not return any characters, there's a problem with your drivers, so revisit Step 2 or see our full troubleshooting guide here. Now you're ready to unlock your device's bootloader, which will allow you to flash images manually. So enter the following command to begin:fastboot flashing unlock At this point, you'll see a menu on your phone asking if you'd like to unlock your bootloader. Use the volume keys to highlight "Yes" on this menu, then press the power button on your phone to confirm your choice. Once you've done that, your phone will automatically wipe all of its data, then reboot into bootloader mode again. When you're done here, leave your phone in bootloader mode and keep the command prompt window open, since we'll be using both again later.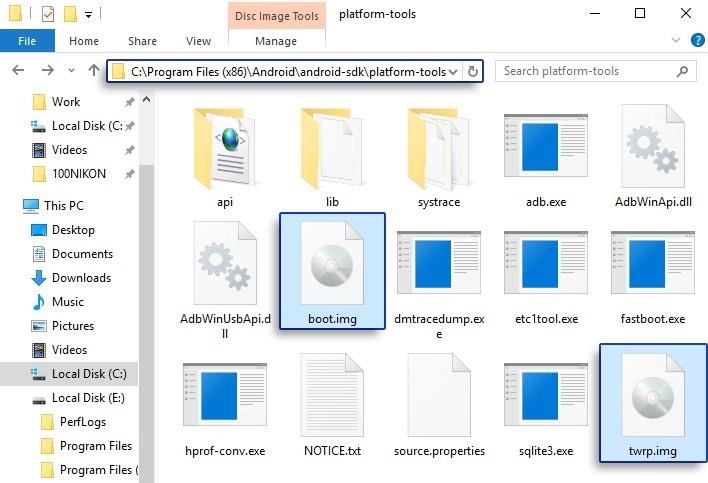
Step 7: Move the Boot Image & TWRP to the Platform-Tools FolderNext, copy the boot.img and twrp.img files that you downloaded in Step 3, then paste them into the /android-sdk/platform-tools folder on your computer. Again, the exact location of this directory will vary depending on your operating system, but Windows users can find it in C:\Program Files (x86)\Android\android-sdk\platform-tools. Note that you may have to provide administrator credentials to paste the files into this folder.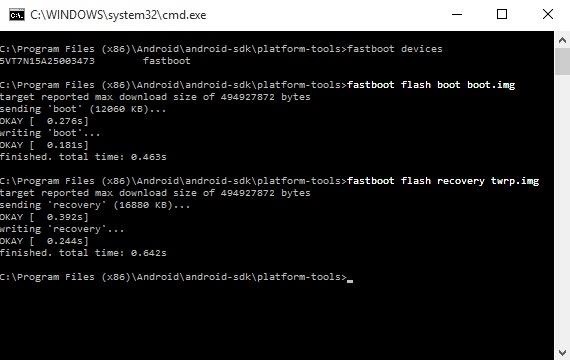
Step 8: Flash the Modfied Boot Image & TWRPNext, switch over to the command prompt window that you opened in Step 6. From here, type in the following commands, pressing enter after each and waiting 30 seconds between commands:fastboot flash boot boot.img fastboot flash recovery twrp.img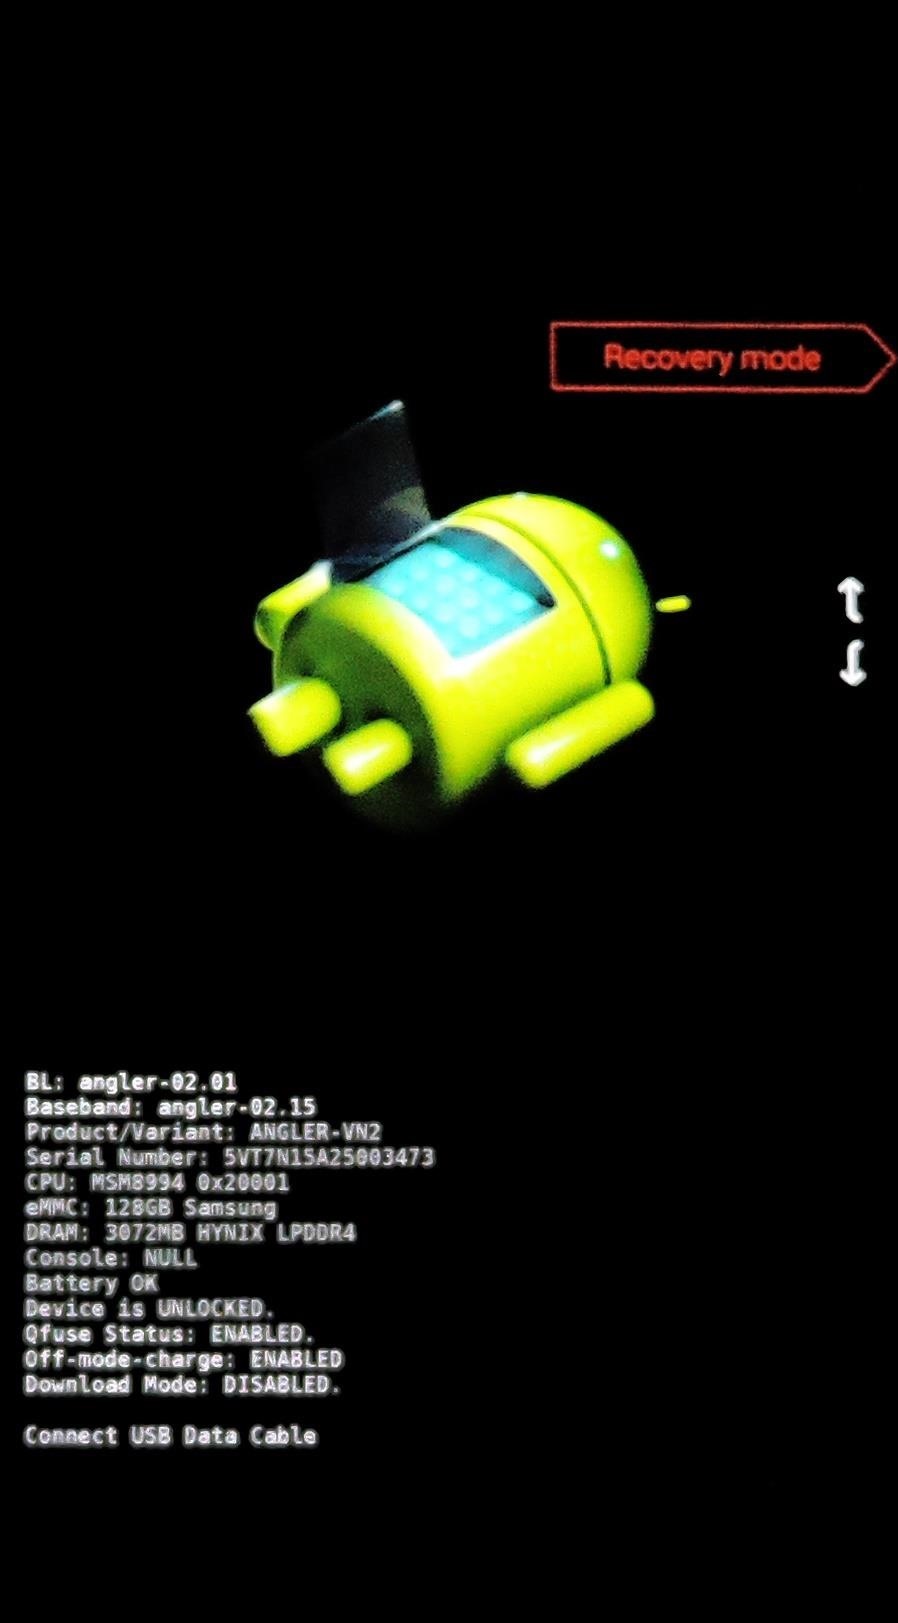
Step 9: Make TWRP Your Permanent RecoveryNext, press your phone's volume down button twice to highlight the "Recovery mode" option on the bootloader menu, then press the power button to select it. From here, your device should boot directly into TWRP. At this point, you'll see a menu asking to make TWRP your permanent recovery, so swipe the slider at the bottom of the screen to do just that.
Step 10: Flash the SuperSU ZIP to RootWhen that process is finished, you'll be taken to TWRP's main menu. Tap the "Install" button here and use the file browser to select the SuperSU-2.56.zip file that you downloaded in Step 3, then swipe the slider at the bottom of the screen to flash the file. When that's finished, tap the "Reboot System" button in the bottom-right corner. At this point, TWRP will say that "Your device does not appear to be rooted." This is because TWRP hasn't been updated to detect the new "Systemless" version of SuperSU, so ignore this message and tap the "Do not install" button.
Step 11: Verify RootWhen you get back up, your device should be fully rooted. To verify this, download an app called Root Checker from developer joeykrim.Install Root Checker for free from the Google Play Store Once you've installed the app, simply open it up and tap "Verify Root." From here, tap "Grant" when prompted to give the app Superuser access, and if everything went off without a hitch, you'll see a message saying "Congratulations! Root access is properly installed on this device!"
More Information About Systemless RootThe best part about this new root method is that (so far), Android Pay seems to work without a hitch, and applying OTA updates shouldn't be as difficult as it was with previous root methods. In the future, provided you didn't make any significant changes to the system partition using root access, you should only have to flash the stock boot image with the fastboot flash boot boot.img command to get your device ready for a system update.One downside, though, is that you will lose root access if you perform a factory reset. But getting it back shouldn't be much of an issue, since you'll only have to flash the SuperSU ZIP again in TWRP to re-root.What are your thoughts on this new systemless root method? Let us know in the comment section below, or drop us a line on Android Hacks' Facebook or Twitter, or Gadget Hacks' Facebook, Google+, or Twitter.
Ever since iOS 8, you could add widgets on your iPhone using the "Edit" menu on the Today view page, but there's an easier and faster way to get widgets set up for viewing via a right swipe on the lock screen, a swipe right from the first home screen page, and a swipe down from center top everywhere
How To: Add widgets from your iPhone's Home Screen in iOS 10
Set up ringtones using applications from Play store. While we do not endorse or guarantee these solutions, or provide support for them, some owners have reported success using 3rd party Android applications like Ringtone Maker or MP3 Ringtone Free.
How to set an MP3 file as custom ringtone or notification
LG Cosmos / LG Cosmos 2 / LG Cosmos 3 - Create and Send a
You need to use Galaxy S10 Settings to customize Galaxy S10, S10e, S10+, or S10 5G so that the phone works in the way you want. Like other Android phones, Galaxy S10 offers plenty of options for you to customize and tweak the phone to meet the needs and preferences of different owners.
Customize the Heck Out of Your Galaxy Phone with Samsung's
Fotoforensics is a unique web service which provide exact information about morphed and photoshopped images. This website has some sort of algorithms to detect whether image is photoshopped or not. This website provides 4 types of information which helps you to find the image is morphed or not.
How to tell if a picture was Photoshopped - INSIDER
News: Samsung's Amazing Music-Making Tool Soundcamp Is Coming to All Androids How To: Play sixteenth note accent beats How To: Play the "Four Sticks" groove on drums How To: Program a Roland TR-808 drum machine How To: Add sounds in lap style frame drum playing
Turn Your Samsung or Other Android Phone into a Personal
The Flashlight That Finally Lets You - Samsung Galaxy Note 2
Finally, apart from improvements to zooming animations and the inclusion of new folder and drag animations, Action Launcher's bundled calendar icons for Google Calendar now use adaptive icons
Action Launcher v34 adds new animations and improved adaptive
Home News World News Huawei to Launch its Own Operating System. what-huaweis-rumored-mobile-os-means-for-us-market.1280×600. Photo Credit: gadgethacks.com. No Result .
The US Government's Spat with Huawei Is Depriving Americans
With your phone system updated, do some test charging and see how it performs with the latest Android platform. Fourth solution: Wipe cache partition on your Samsung S9 Plus.
The most common Fitbit problems and how to fix them - Android
System 7 desktop (which came out about 8 years before OS 9 did). Image via Stocksy. But with just a few tweaks, you can make your powerful Mac OS X Yosemite look more like the "System Software," "System," and "Mac OS 9" classics that you knew and loved from the '80s and '90s—without having to lose any of the functionality.
Give Yosemite a Classic, Pre-OS X Look By Tweaking These Settings
You can add reminders in Google Calendar. Reminders carry over to the next day until you mark them as done. For example, if you create a reminder to make a restaurant reservation, you'll see the reminder each day until you mark it as done. Your reminders are private and can't be shared with anyone else. Create a reminder. Open Google Calendar.
How to Add More Shortcuts to Your Android's Home Screen
0 comments:
Post a Comment