Notes 101: How to Scan, Edit & Share Documents Right Inside Notes on Your iPhone
There are plenty of third-party apps for scanning documents on your iPhone, but they can all be tossed out the door since iOS 11 includes one by default now. Instead of a dedicated app, it's included as part of the Notes app, and it's fairly easy to use. After scanning, you can save it, print it, turn it into a PDF, add markup, and more.It's amazing that Apple waited until 2017's iOS 11 to implement a built-in document scanner, as we would have loved to have this iPhone feature a lot earlier. Better later than never, and the first iteration of it is pretty impressive. Maybe more scanning features will become available in future updates, but in the meantime, it's got all the basic tools needed right now.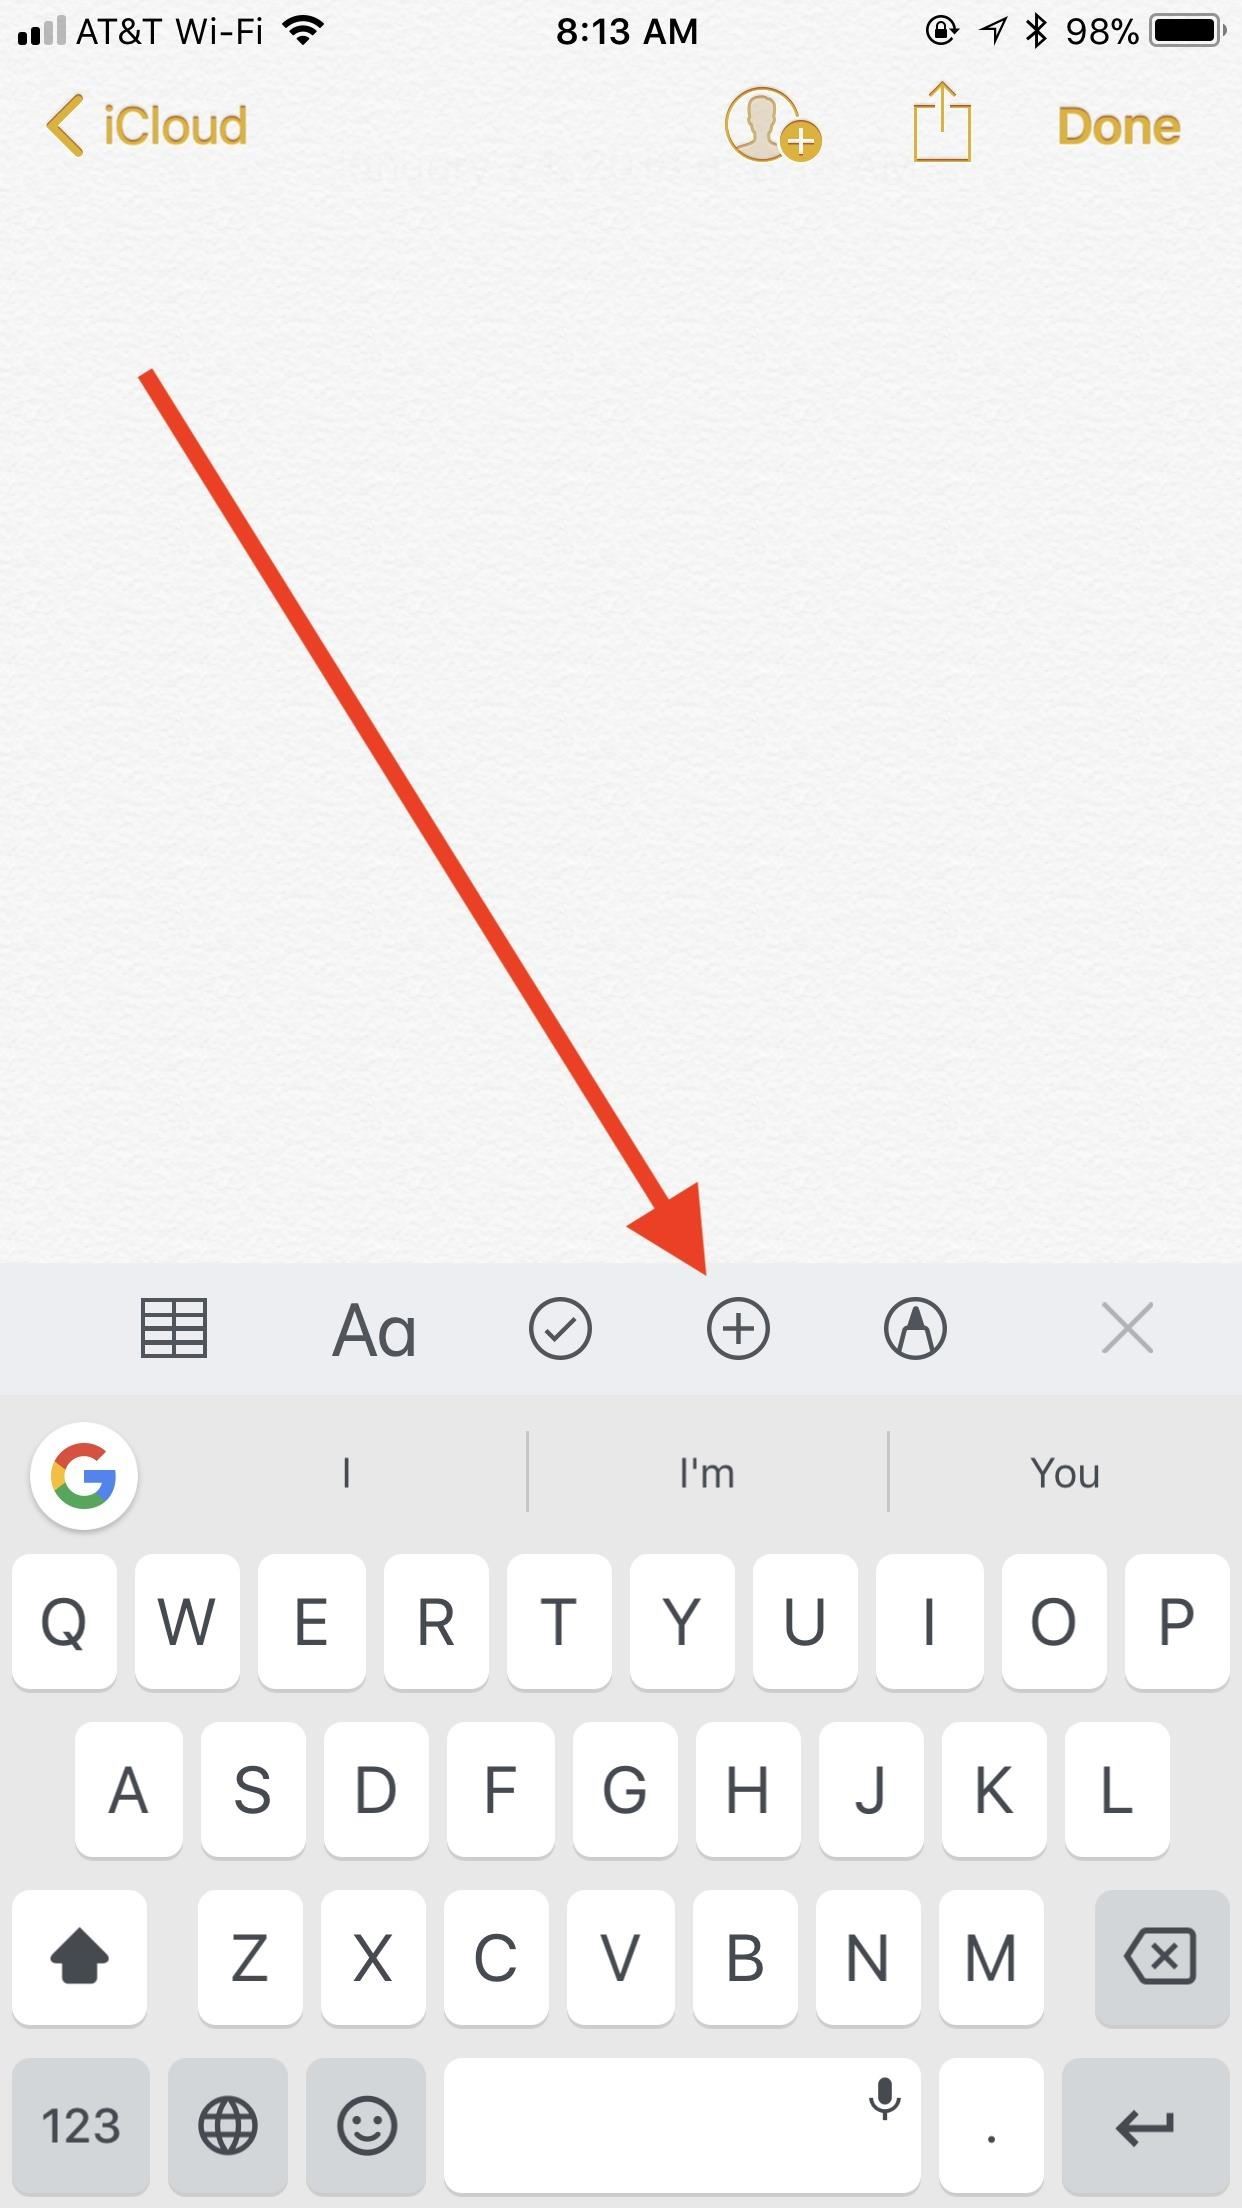
Step 1: Access the ScannerWhile we would like to see Apple give us the option to add the document scanner to the 3D Touch menu for Notes on the home screen, getting to the scanner is still simple. Just open any existing note or start a new one.If the keyboard is hidden, tap the "+" icon in the bottom menu. If the keyboard is visible, hit "+" in the formatting toolbar above the keyboard (you may have to hit "+" first to expand the formatting toolbar). Lastly, tap "Scan Documents."Don't Miss: Access the Notes App Directly from the Lock Screen in iOS 11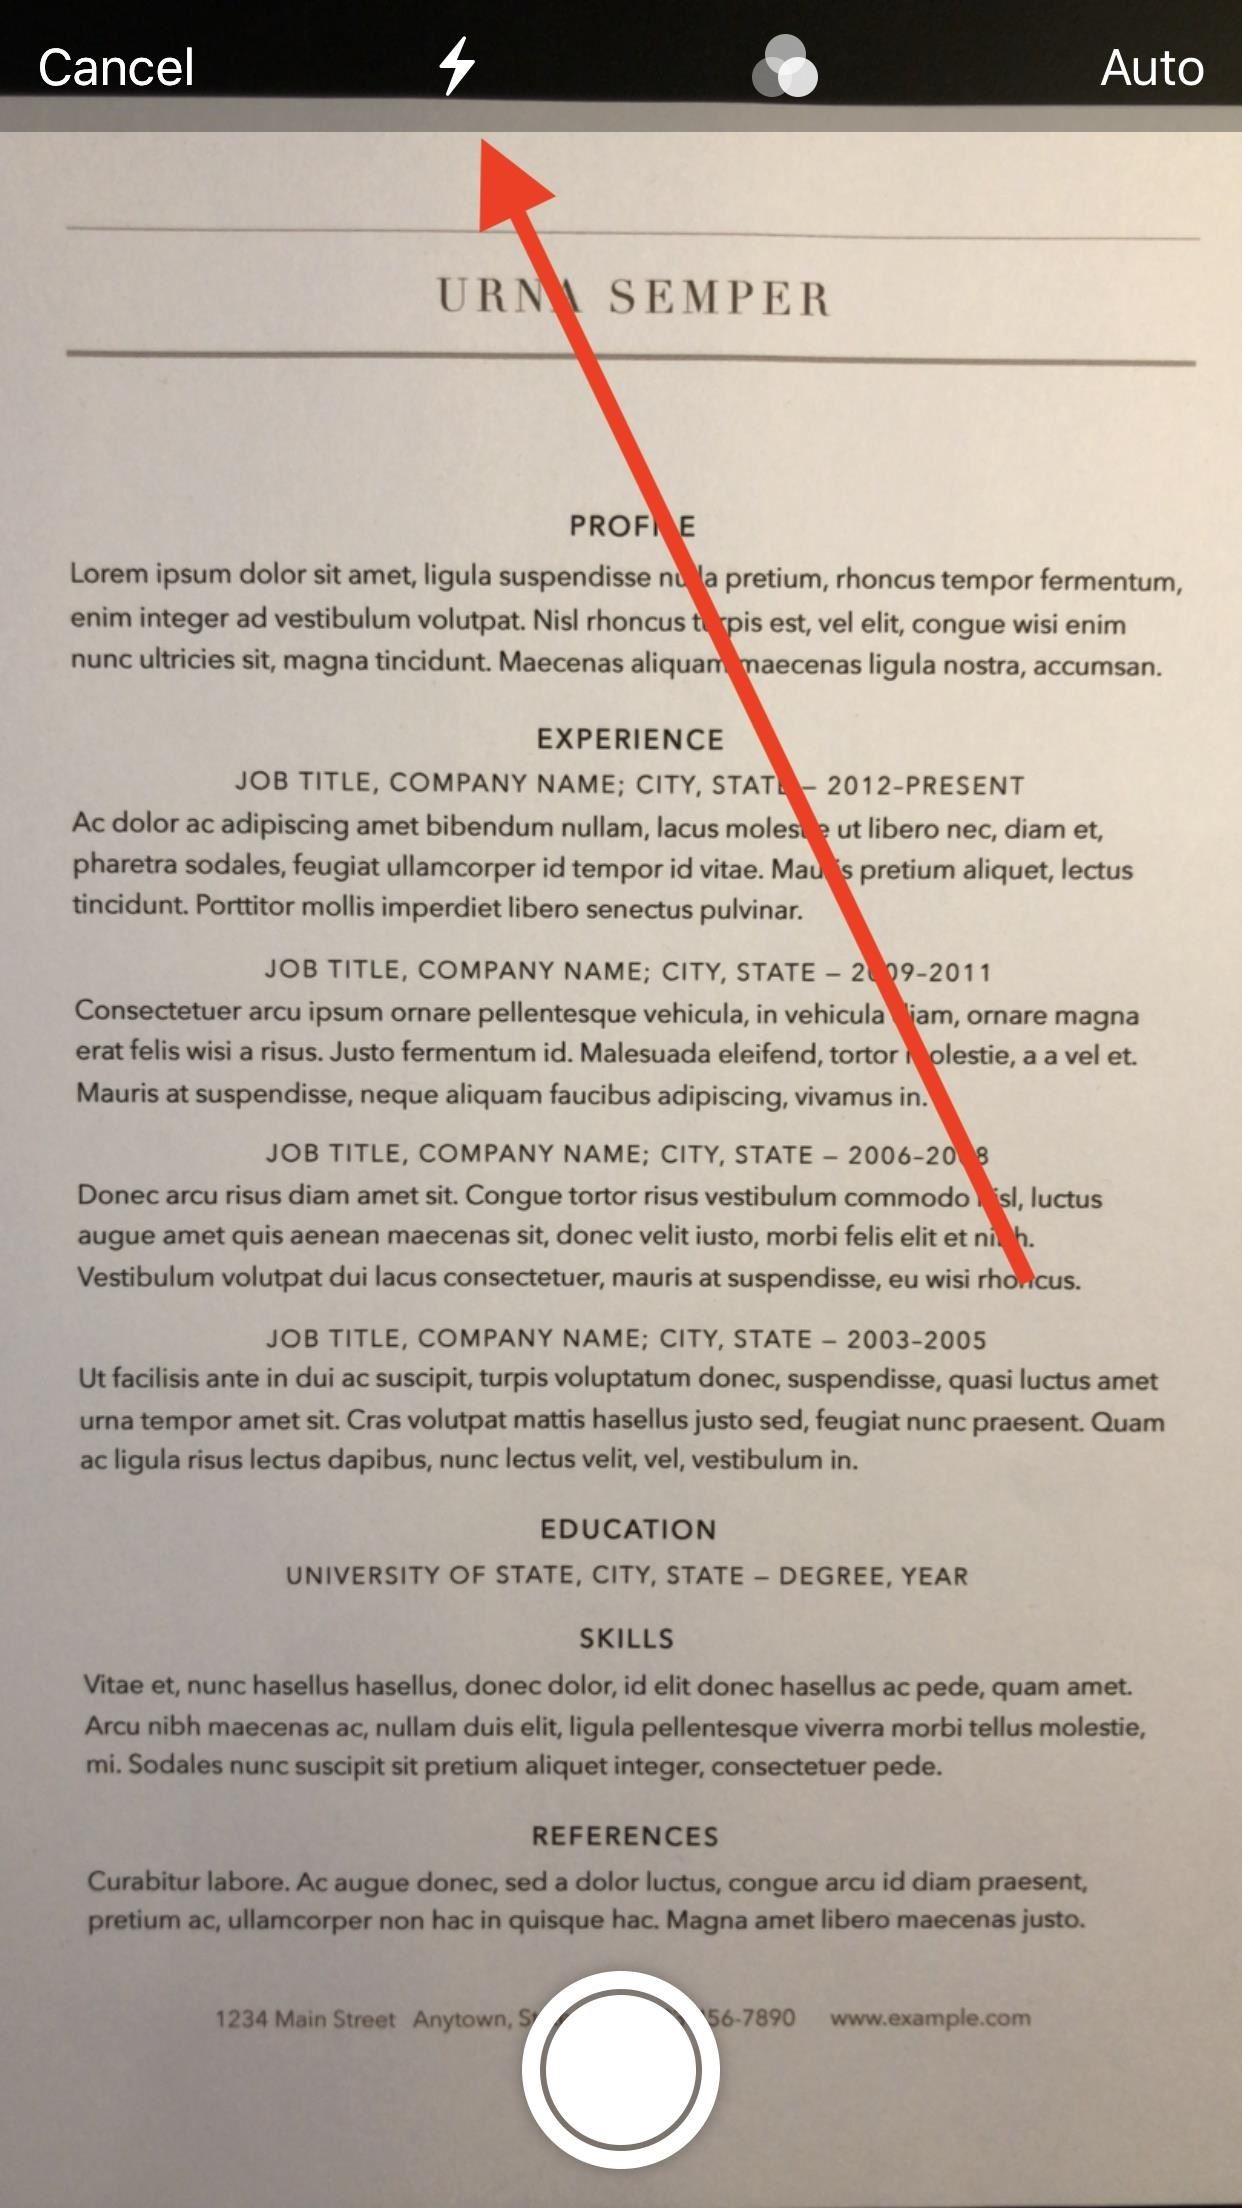
Step 2: Select Your OptionsAt first, the document scanner looks a lot like the iPhone's main Camera app. However, you will notice some different options at the top of the display.Flash: The lightning bolt is your flash control. You can set it to "Auto" to automatically activate when needed, or you can manually enable ("On") or disable it ("Off") as you see fit. Filters: The three circles are your color control. You have the following options: "Color," which takes a color scan of your document; "Grayscale," which gives you a spectrum of hues between black and white; "Black & White," which simply scans the document in black and white colors; and "Photo," which takes a regular photo of your document. You do have the option to choose from any of these options after the scan, so don't worry about them too much now. Shutter control: The "Auto" option on the far-right is your shutter control. Notes will automatically take a scan of your document when in the correct position (you'll see this when Notes presents a yellow overlay over your subject). If you choose "Manual," Notes will still show the overlay, but it won't scan until you tap the shutter button at the bottom of the screen. Flash (left), color filter options (middle), and the shutter control option (right).
Step 3: Scan Your DocumentThis is pretty intuitive and was pretty much explained above in the "Shutter control" bullet. Hover your iPhone's camera above the document, trying to keep it parallel and level, until the yellow overlay has covered the note perfectly. It's okay if it's not totally level, as Notes will correct it as best as possible.
Automatically ScanningIf you have "Auto" chosen, it will take a scan of it as soon as it looks good. The scan will move to the bottom-left corner of the display for later viewing. If you need to take more scans, you can do so now, but otherwise, tap your scan now to view the editing options.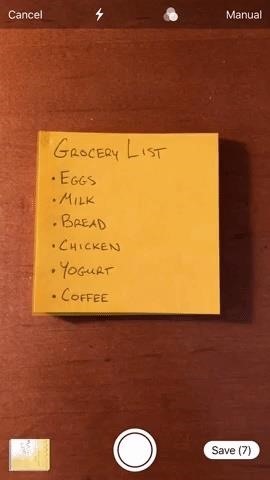
Manually ScanningUnlike with the "Auto" option, you'll have to tap the shutter button yourself if "Manual" is selected. You can also press a volume button to take the scan if tapping the shutter is too much finger gymnastics.After manually scanning, you have the option to adjust the crop of the document. Drag the four corners of the selection until your scan is how you like it. Keep in mind, your image will always fit itself into a rectangular shape — the "crop" options are based on the angle of the document, not the shape.If you need to redo the scan, simply tap "Retake." When finished, tap "Keep Scan," which will move it to the bottom-left corner so you scan more documents if necessary. If it's just that one scan, tap on it to view the editing options.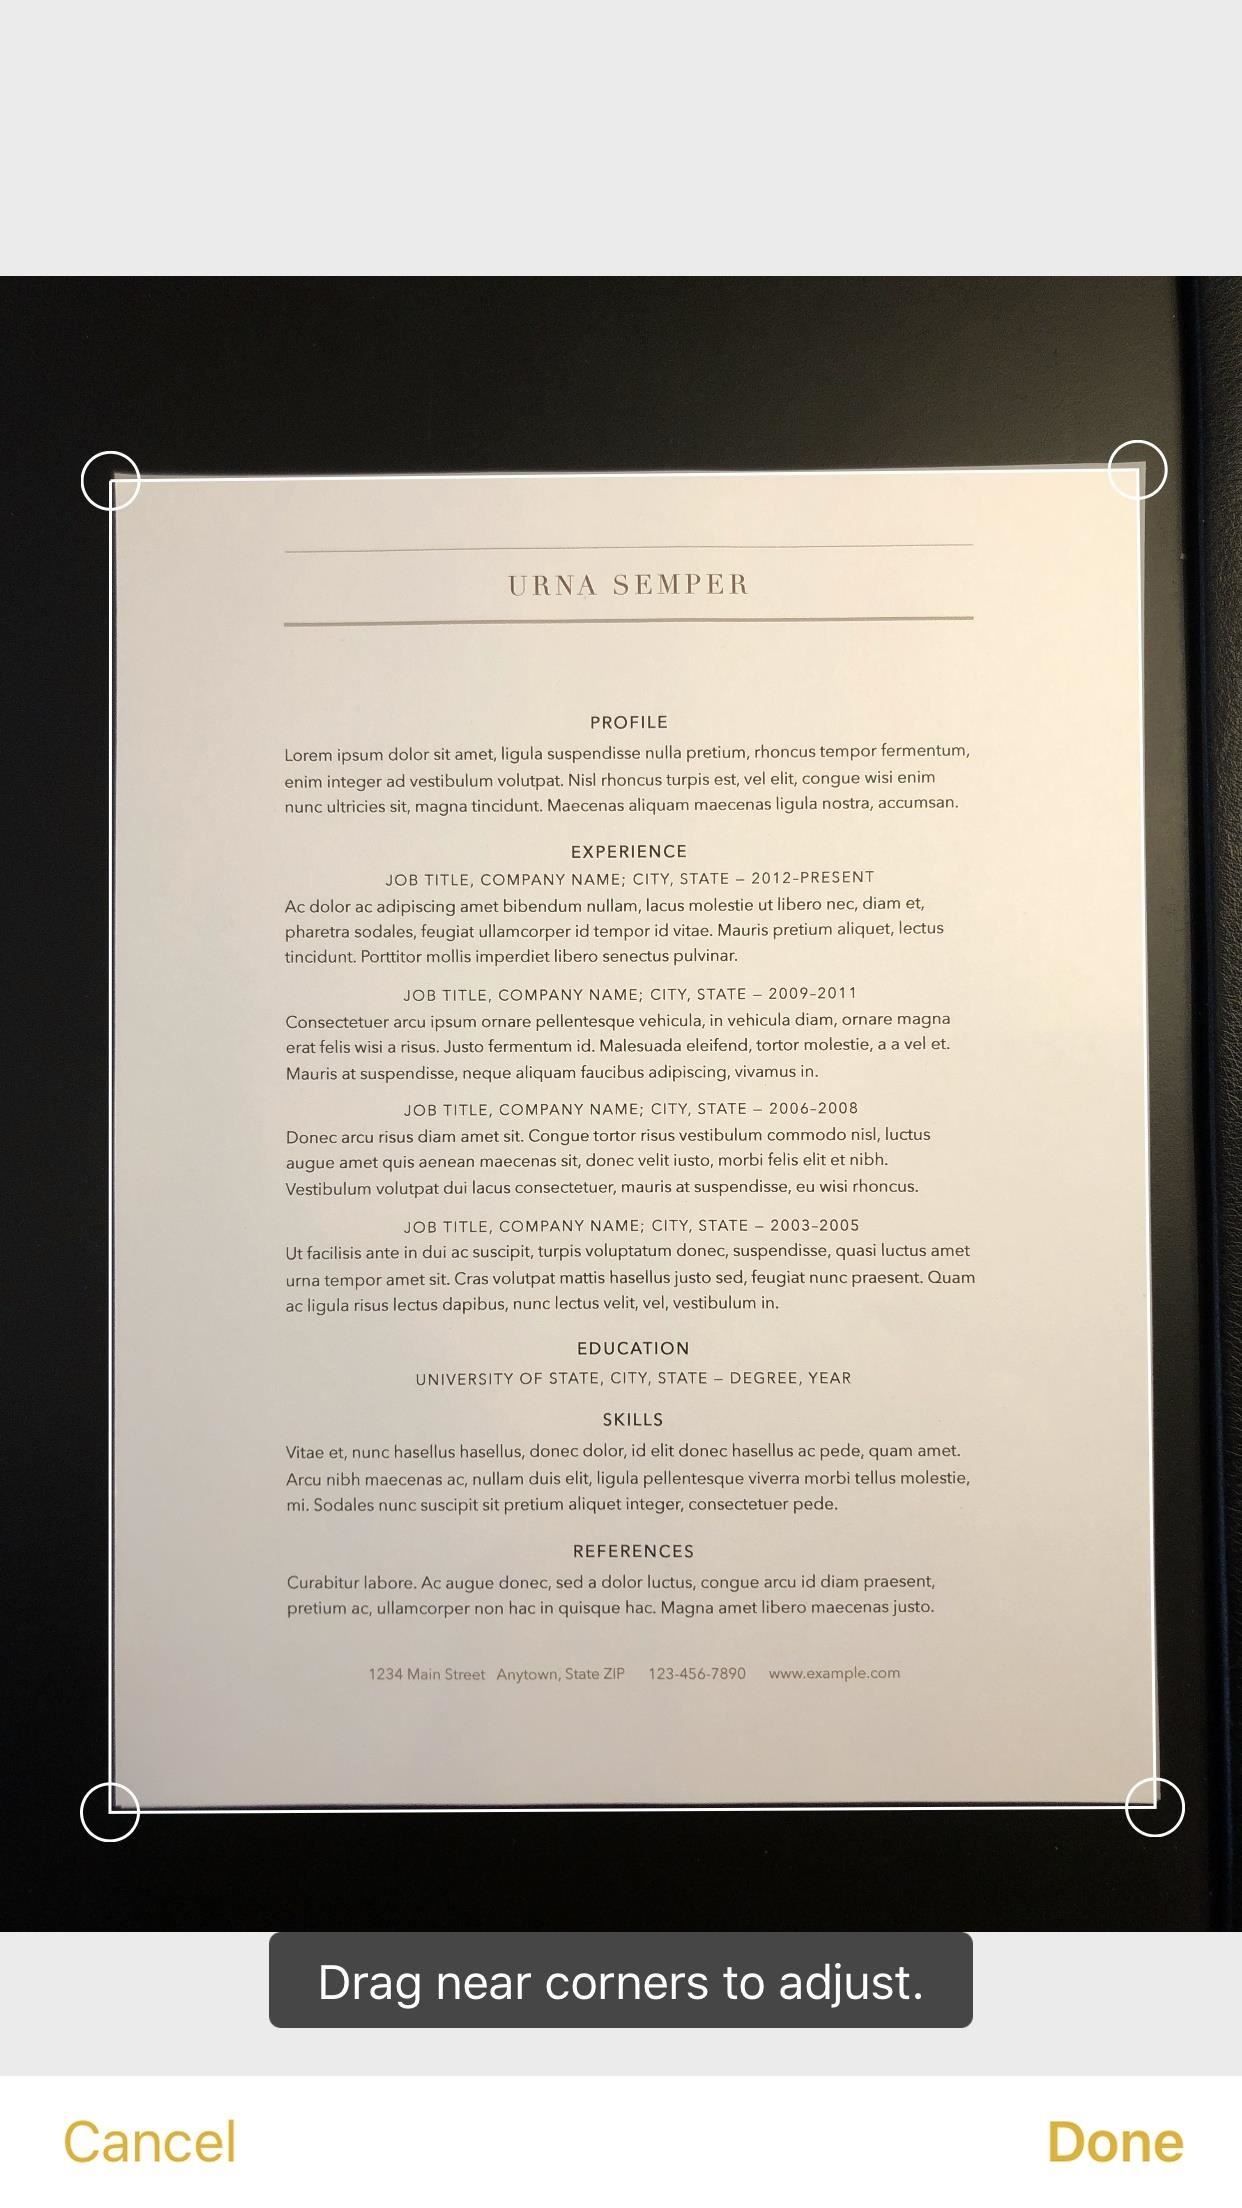
Step 4: Edit Your Scanned DocumentOn the edit screen, the bottom row features some new and old tools to adjust your scan. If at any time you're not satisfied, you can tap "Retake" in the top-right corner of the display to go through Step 3 all over again to get a better scan.Crop: This button allows you to adjust each of the corners Notes has set to be a part of your scan. This is especially useful if your document was taken at an odd angle. Tap "Done" when finished. Filters: The three circles are, again, your color filter options. If you didn't choose an option previously, or if you'd like to change your choice, you can pick from the same four options here. Tap the circles again to leave this menu. Rotate: The third option lets you spin your document 90 degrees at a time. Trash: Finally, the trash can icon is exactly what it looks like; If you're you don't need the scan anymore, tap it, and your document is toast. Cropping (left), color filter options (middle), and rotating (right).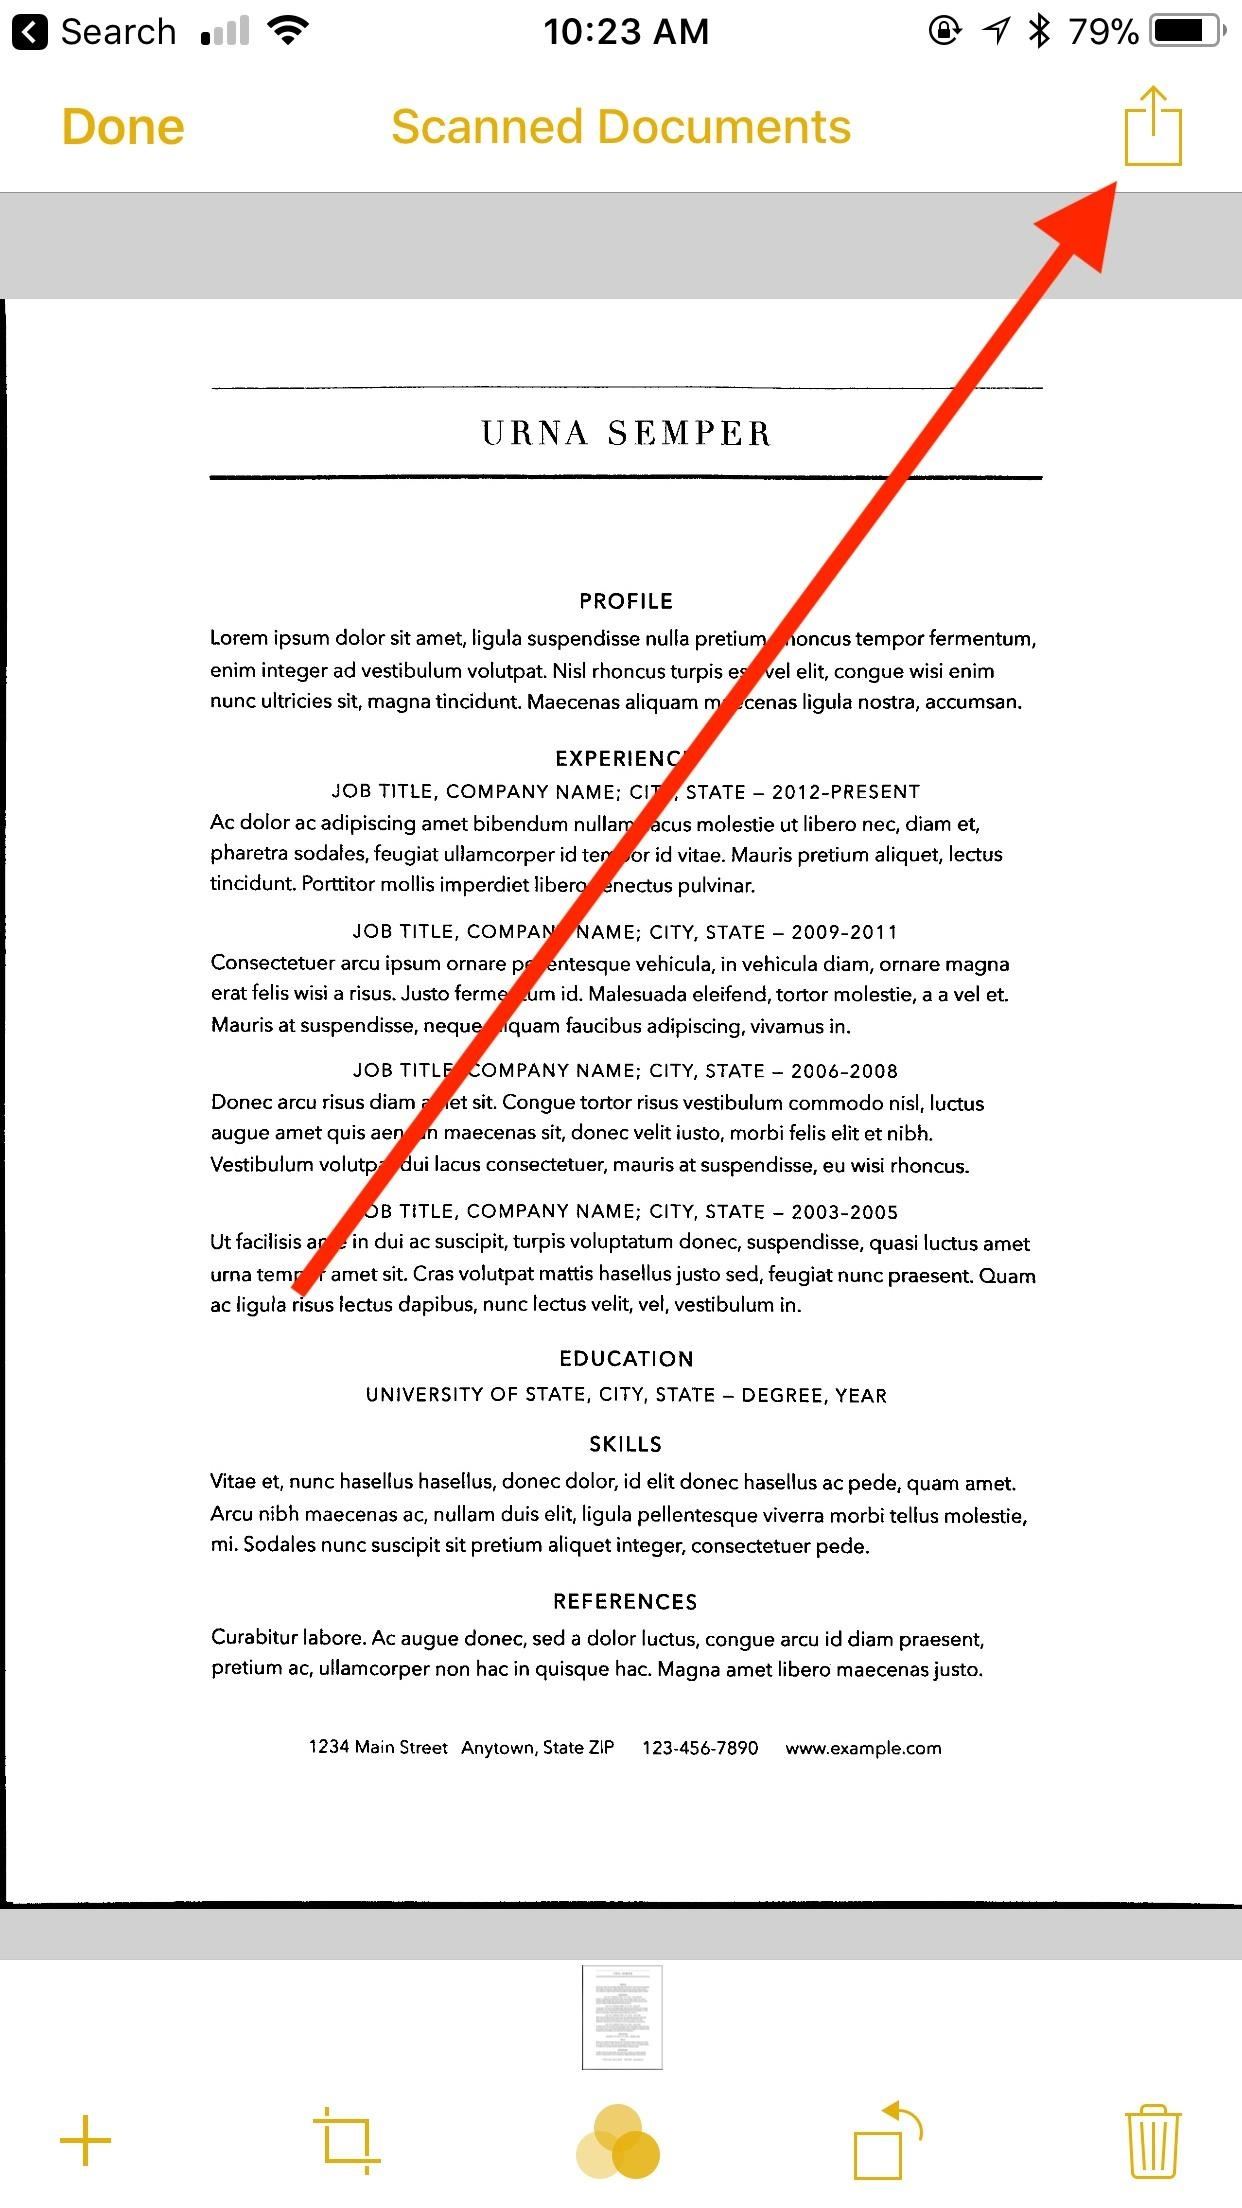
Step 5: Save Your Edited DocumentIf you're happy with both your scan and any edits you have made, tap "Done." This action brings you back to the scanner, but tap "Save" to return to your note and embed the document(s).If you tap on an attached document in a note, you have access to all the same editing tools as before, plus some new options. A "+" button in the bottom-left corner of the display will let you add a new scan, while the share button in the top-right corner allows you to send your note to any of the options in the share sheet.
Step 6: Use the Share Sheet OptionsLet's go back to the share sheet from Step 5. There are a lot of functions here, but let's focus on the bottom row of activities. The top sharing row will vary based on which apps are installed on your device, but the bottom row features most of the same options across all iOS devices.Create PDF: As you would expect, tapping this option turns your scan into a PDF. From here, you can access a new share sheet specifically for your PDF, as well as access the Markup tool in the top-right corner (more on that later). Tap "Done," then choose "Save File To" to save the file or "Delete PDF" to erase it. Print: Tap this option to print your scan. Choose your printer, then select how many copies you'd like to print. Copy: Tap on this option to save your scan to your iOS clipboard. Move to another note or another app to paste your scan as you see fit. Markup: Markup gives you tools to write and draw on your scan. Choose your writing tool from the table below. Tap the black dot to choose from six different colors. Tap the "+" button on the far right to access an additional suite of tools, such as "Text" for text boxes, "Signature" to add a signature, "Magnifier" to add a magnifying glass to your scan, or adding shapes by tapping on one at the bottom of the menu. Use the undo and redo arrows at the top of the display to fix any mistakes. Save to Files: Tap this option to save your scan to either your iCloud Drive in the Files app or to a folder on your device with "On My iPhone."Don't Miss: How to Customize Your Notes' Paper Style with Lines or GridsFollow Gadget Hacks on Facebook, Twitter, YouTube, and Flipboard Follow WonderHowTo on Facebook, Twitter, Pinterest, and Flipboard
Cover image and screenshots by Jake Peterson/Gadget Hacks
Smartphones generally have limited storage, but counter this issue with an always-on internet connection. This led to the proliferation of cloud storage services, which allow us to store and access our large media libraries remotely. The problem here is that most cloud storage services make it a clunky experience to access music and video files.
android - How to play streaming music file from cloud storage
How to Hack Someone's Cell Phone to Steal Their Pictures. This hack is one of the first online hacks for moviestarplanet ever! .. Hack Snapchat Account On Android & iPhone, Snapchat Hack Tool which really become famous ..Join Hosting UK It's as easy as 1,2,3
2 Ways To Hack Into Someone's Cell Phone without Them - MxSpy
How to Scrub GPS Data from Your Photos. For Android. You'll need to (free) app called ImageOptim that is able to remove EXIF data (and reduce your image's file size). Simply drag and drop
How to Remove EXIF Metadata from Photos on Android
How to Trigger Green Traffic Lights Anybody who rides an electric scooter, a motorcycle, a bicycle, or drives a small car may notices this problem. Even when there is not traffic, the traffic light does not turn green.
The Easiest Way on How to Trigger Green Traffic Lights! | Do
If you have a 4th generation iPad or newer, any model of the iPad Air, any model of the iPad Pro released before late 2018, or any model of the iPad mini, you'll need Apple's Lightning to USB Camera Adapter to use USB devices. You can connect the adapter cable to the Lightning port at the bottom of the iPad, then connect a USB accessory to the
How to Connect a USB Drive to an iPad - ebay.com
When you do so, an album named Instagram Photos is created in your Facebook's Photos page where you can place all other images that you want to share from Instagram. Here is how you can link your Instagram and Facebook accounts: Press the Sleep/Wake button to switch on your iPhone.
How to Invite Your Facebook Friend to Join Instagram
How to retrieve the saved Web browser passwords. If you use Chrome, Firefox or Opera web browsers you have the ability to view and manage saved passwords from browser's environment (through its settings/options), but if you use Internet Explorer or Microsoft Edge, you have to use a third party utility to show the saved passwords, because the
Remote Chrome Password Stealer « Null Byte :: WonderHowTo
If you want Install custom ROM on your HTC Hero, remove pre-installed apps from your HTC Hero, Install and use ROOT apps, Install Custom recovery on your HTC Hero, Change the IP of your device, Change the font of Android… In this article, we offer you the easiest way to HTC Hero.
How to Install A Custom ROM On Any Android Device (2019
We've listed some of the hand-picked yet good android movies apps to make you more entertained through your smartphone. Well guys, watching movies is one of best way to pass time but watching movies on Television is really big pain as there is a lot of advertisements. So, we are listing best free movie apps for android which you can try out.
The Best Apple TV Apps | Digital Trends
News: Finally! These 5 MLB Stadiums Now Accept Apple Pay Gmail 101: How to Send & Receive Money with Android's Default Email App News: Cinemark Movie Club Is a Great Subscription for Occasional Filmgoers & Popcorn Addicts
Apple released the third public beta for iOS 12.4 on the afternoon of May 28. The update arrives roughly three hours after Apple published 12.4's third developer beta, and eight days after 12.4 public beta 2.
Apple Officially Releases iOS 12.2 Beta 3 to Public Software
All Android devices do come with a minimal stock recovery, but TWRP takes it a step further with a much more feature-packed and user-friendly environment. Installing TWRP will override your stock recovery, but you gain the ability to have full control over your new recovery experience with many useful root-related features.
How to Install TWRP Recovery on OnePlus 5T (Android Oreo
How to Take apart the HP iPAQ hw6515 cell phone for repair
We've talked before about EXIF data—or metadata—attached to photos and how it can expose information about your location, what type of device you're using, and even the device or camera's unique identification number. If you think it's not that big a deal, just ask John McAfee—his location was
What Is EXIF Data, and How Can I Remove It From My Photos?
Five Awesome Apps To Take Your Instagram Stories Game To The Next Level Next Article --shares; and network you need to get your business off the ground—or take it to the next level.
2019 Hashtags for Instagram: The Ultimate Hashtags Cheat Sheet
0 comments:
Post a Comment